Yup, still trying to use up all that left over Easter Ham. One of my husbands favorite dishes is chicken cordon bleu so I used that flavor profile to come up with this lasagna. Best part was I already had all the ingredients on hand and got rid of a decent amount of ham. What's left will go into a pea soup and then it will finally be gone with nothing wasted.
Chicken Cordon Bleu Lasagna
1 large chicken breast half, cooked and shredded
1 cups ham, cooked and minced
1 small container ricotta cheese
2-4 Cups swiss cheese
3 Tbs butter
2 Tbs flour
3-4 cloves garlic, crushed
1 quart 1/2 and 1/2
S & P to taste
2 boxes lasagna noodles (I used Barilla No bake)
To mince the ham and shred the chicken, I used a food processor and pulsed the chopping blade to get the desired consistency. You want the pieces to be small but be careful not to make paste. Mix the minced meats with the ricotta cheese in a bowl and set aside
In a medium sauce pan, melt butter. Add crushed garlic and saute on medium-low heat to infuse flavors. Add flour and stir to make a roux. Add half and half, wisking constantly. Let simmer to thicken. S & P to taste.
In a baking dish, coat the bottom of the dish with the sauce. Add a layer of lasagna noodles.
Spread 1/2 of the meat and cheese layer over the noodles and add another layer of noodles.
Cover the noodles with sauce and add a layer of swiss cheese
Repeat layers one ore time.
Cover dish with foil and bake at 350 F for 30 minutes Remove cover and hit the broiler for a few seconds if you want to brown the top. enjoy!
Monday, April 20, 2020
Monday, April 13, 2020
Vegetating
So Easter has come and gone and thanks to Chinese wet markets and this lovely virus they have released, we got to see nobody for the holiday. Not a huge deal since I am no social butterfly but I would like to see my Mom and Dad sometime soon and get back to gym before my ass becomes the size of Rhode Island. For Easter the Hubs wanted a spiral ham. I know I have said repeatedly on here how much I don't really dig ham but I know he loves it and he hasn't had it in quite a while so I made it. It was ok but, for me, what I love most about holiday meals is the vegetables that go with it. This holiday was no exception. I did have an obligatory slice of ham but the rest of the meal was all about the veggies. Ironic coming from the girl who as a child would only eat corn, potatoes, and salad. My favorite on the table was a mix of brussel sprouts and asparagus. With brussel sprouts being the new kale, I am expecting these to be everywhere in the near future. Not complaining. I like them WAY better than kale. And this recipe is certainly a delicious way to prepare them!
Roasted Brussel Sprouts and Asparagus
1 package fresh brussel Sprouts, trimmed and halved (I like the big ones)
1 bunch fresh asparagus, trimmed
2-4 Tbs olive oil
Salt and pepper
1/4 C Parmesan cheese
2-3 cloves garlic, crushed
about 1/4 Cup balsamic vinegar
Preheat over to 400F
Rinse brussel sprouts, trim woody ends and cut in half. Place in roasting dish.
Drizzle olive oil over the sprouts, season with salt and pepper and toss to coat.
Roast for 10-15 minutes until starting to soften
Remove from the oven and add asparagus to the dish and toss to coat.
Return to the oven for another 10 minutes
While the asparagus and sprouts are finishing in the oven, mix the parmesan cheese and crushed garlic in a small bowl until garlic is no longer in one large clump.
Remove vegetable from the oven, sprinkle with the garlic-cheese mixture.
Pour a glug or two of balsamic vinegar over the vegetables and toss everything to coat and distribute the garlic cheese mixture. The residual heat from the pan and vegetables will cook off the crushed garlic and thicken the vinegar. Let stand for a minute or two and chow down.
Roasted Brussel Sprouts and Asparagus
1 package fresh brussel Sprouts, trimmed and halved (I like the big ones)
1 bunch fresh asparagus, trimmed
2-4 Tbs olive oil
Salt and pepper
1/4 C Parmesan cheese
2-3 cloves garlic, crushed
about 1/4 Cup balsamic vinegar
Preheat over to 400F
Rinse brussel sprouts, trim woody ends and cut in half. Place in roasting dish.
Drizzle olive oil over the sprouts, season with salt and pepper and toss to coat.
Roast for 10-15 minutes until starting to soften
Remove from the oven and add asparagus to the dish and toss to coat.
Return to the oven for another 10 minutes
While the asparagus and sprouts are finishing in the oven, mix the parmesan cheese and crushed garlic in a small bowl until garlic is no longer in one large clump.
Remove vegetable from the oven, sprinkle with the garlic-cheese mixture.
Pour a glug or two of balsamic vinegar over the vegetables and toss everything to coat and distribute the garlic cheese mixture. The residual heat from the pan and vegetables will cook off the crushed garlic and thicken the vinegar. Let stand for a minute or two and chow down.
Monday, February 17, 2020
Meatless Monday
I am not one to jump on bandwagons when it comes to anything so please don't think that I eat meatless every Monday and tacos every Tuesday. I eat what I feel like having on any given day, usually in way too large of a serving. However, I had a vegetarian friend visiting this weekend and I wanted to be sure to have something yummy for her to eat while she was here. I didn't want to do pasta as that would have been too heavy for lunch and salads would be too light. It's way too cold here for light eating. We wanted something hearty and warm but not heavy so I decided on a vegetarian chili. It was fantastic and so easy to make. This is a very versatile recipe so add/omit to accommodate your tastes. Here is how it went down.
Erika's Vegetarian Chili
2 Tbs oil
1 onion, chopped
3 cloves garlic, chopped
2 stalks celery, chopped
2 carrots, chopped
1 red pepper, roasted, peeled, and chopped (can use jarred roasted red peppers, I did)
2 ears corn, kernels cut off (can sub with 1 cup frozen corn)
1 medium zucchini, diced
1 can diced green chilies
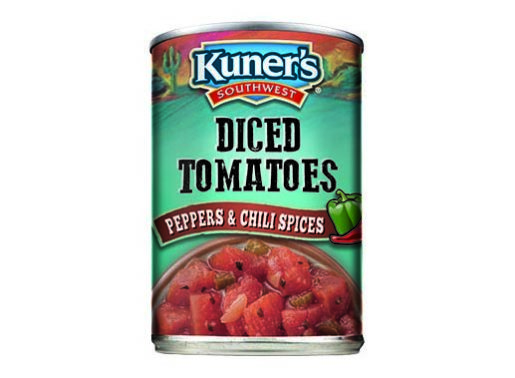
2 cans diced tomatoes with chilies (Rotel or equivalent, I used a Kuners brand variety - Diced tomatoes with Peppers with chili spices)
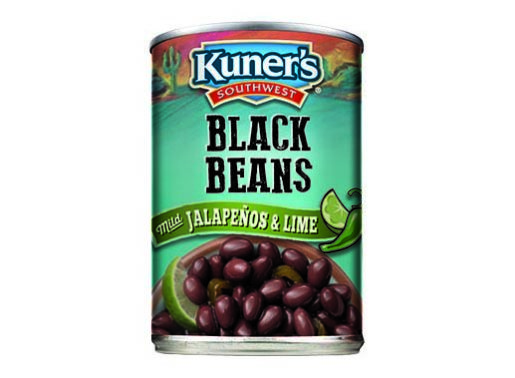
1 can black beans (I used Kuners brand again - Black beans with jalapenos and lime)
1 Cup red lentils
1 box vegetable broth
2 Tbs cumin
2 Tbs chili powder
1 Tbs oregano
1 tsp black pepper
Salt to taste
In a large sauce pan saute onion, garlic, celery, carrots, until softened. Add remaining ingredients and let simmer until cooked through and lentils have broken down (red lentils will do this fairly quickly). Adjust seasonings to taste. If the chili is too thin you can add tomato paste by the tablespoon until you reach desired consistency. To add heat add cayenne pepper and/or diced fresh jalapeno/serrano peppers to taste. You can eat this the day you make it but I personally think it tastes better the next day. I like to serve it with shredded cheddar, sour cream, diced avocado, and crushed tortilla chips. Omit the dairy if you want to keep it vegan.
On a side note - I LOVE, LOVE, LOVE, Kuner's products for southwest style recipes. Their seasoned canned goods are fantastic and if you don't cook a lot or don't want to have to buy seasonings that you may not use much you don't have to - they take care of most of that for you right out of the can.
Erika's Vegetarian Chili
2 Tbs oil
1 onion, chopped
3 cloves garlic, chopped
2 stalks celery, chopped
2 carrots, chopped
1 red pepper, roasted, peeled, and chopped (can use jarred roasted red peppers, I did)
2 ears corn, kernels cut off (can sub with 1 cup frozen corn)
1 medium zucchini, diced
1 can diced green chilies
2 cans diced tomatoes with chilies (Rotel or equivalent, I used a Kuners brand variety - Diced tomatoes with Peppers with chili spices)
1 can black beans (I used Kuners brand again - Black beans with jalapenos and lime)
1 Cup red lentils
1 box vegetable broth
2 Tbs cumin
2 Tbs chili powder
1 Tbs oregano
1 tsp black pepper
Salt to taste
In a large sauce pan saute onion, garlic, celery, carrots, until softened. Add remaining ingredients and let simmer until cooked through and lentils have broken down (red lentils will do this fairly quickly). Adjust seasonings to taste. If the chili is too thin you can add tomato paste by the tablespoon until you reach desired consistency. To add heat add cayenne pepper and/or diced fresh jalapeno/serrano peppers to taste. You can eat this the day you make it but I personally think it tastes better the next day. I like to serve it with shredded cheddar, sour cream, diced avocado, and crushed tortilla chips. Omit the dairy if you want to keep it vegan.
On a side note - I LOVE, LOVE, LOVE, Kuner's products for southwest style recipes. Their seasoned canned goods are fantastic and if you don't cook a lot or don't want to have to buy seasonings that you may not use much you don't have to - they take care of most of that for you right out of the can.
Thursday, February 13, 2020
Fighting the Chill
Late winter/early spring in New England is the total PITS! It is by far my least favorite time of year. Cold and damp and depressing. I even missed the syrup window this year so I don't even have that to perk me up. Just a bunch of mud, dead worms and stir crazy, cooped up dogs to contend with. My husband has also seemed to have developed the uncanny ability to catch every germ in town. So, to keep myself busy, repel the dreary cold and help sooth upset tummy's, I have brought forth more soup for you! This particular recipe is a 2 day process for me but you can certainly shorten it up if you want. You don't need an instant pot either. On a conventional stove top, you would just need to cook part 1 low and slow for about 6-8 hours and your results would be similar. You can make this soup in a single day as part 2 comes together quickly. I break it up into a 2-day process to make it easier on myself and give the flavors time to meld.
Erika's Instant Pot Beef and Barley Soup
Ingredients
Part 1
4 T butter
2 onions, sliced
1, 3-4 pound beef roast (chuck, pot, rump, bottom – you’re
going to be cooking the shit out of it so any cut will do but leaner cuts will
have stringier results)
1 can coca-cola (does wonders to tenderize)
¼ C soy sauce
2-3 gloves garlic
1 envelope onion soup mix (can omit or just add a bouillion
cube and some onion powder to substitute. Sometimes, I will add an envelope of
good seasons Italian dressing as a substitute, too)
Few shakes Worcestershire sauce
(Sometimes I also add marrow bones to up the flavor and give my dogs a treat to chew on for later)
Saute onions and butter in instant pot until slightly
browned
Add meat and remaining ingredients
Add lid a pressure cook for 1 hour. Let decompress naturally
and cool, skim fat. For tougher cuts of meat you can extend the pressure cooking time, as needed.
Part 2
2 T oil
2-3 stalks celery chopped fine
2-3 carrots chopped fine
1 box beef broth
Aprox. 1 cup barley
2 Tbs molasses (optional)
In a large sauce pot saute carrots and celery in oil until
softened
Remove meat from instant pot and, if using a roast, break up
the meat up into soup-sized pieces
Add liquid from instant pot (you can pour it through a sieve
if there are lots of gross fatty bits in it)
Add beef broth and bring to a boil
Reduce to a simmer and add barley
Simmer until barley is cooked. Add molasses if
desired (I like the flavor it gives)
Monday, January 13, 2020
Those Rolls
I have on a mission to make the best cinnamon rolls possible....and up until this weekend, I have failed miserably at my quest. I have tried recipes that used pudding mix, cinnabon knockoffs and various "Worlds Best" only to be disappointed time and time again. I fault myself partially because I am not the greatest baker. Yeast and I have a love hate relationship. I want to be a good baker but am so often defeated that I become reluctant to even keep trying. Enter this recipe. The best part of it is the very detailed and explicit instructions. THIS I believe is what the other recipes I have used lacked. They recipe describes how the dough should look and feel at every step making it harder to mess up. I turned out the best cinnamon rolls I have ever made with this recipe and actually am looking forward to making them again - not too soon though because I will eat them all. The only adjustment I made to the recipe is to half the frosting recipe (recipe is presented with full frosting recipe below). We don't like tons of frosting and I didn't want any leftover. The halved amount was perfect for for the 11 rolls I turned out. The only recommendation I would make is to NOT mix the butter with the sugar and cinnamon for the filling. I found it to be really difficult to spread evenly. I would recommend spreading the softened butter on the dough first and then following with the dry brown sugar and cinnamon mixture to get more even coverage.
Hard to mess up Cinnamon Rolls (recipe from Tastes of Lizzy T)
Ingredients
For the Dough:
- 1 cup warm milk (about 115 degrees F)**
- 2 1/2 teaspoons instant dry yeast (I like Red Star Platinum Baking Yeast)
- 2 large eggs at room temperature
- 1/3 cup butter melted
- 4 1/2 cups all-purpose flour
- 1 teaspoon salt
- 1/2 cup granulated sugar
For the Filling:
- 1/2 cup butter almost melted
- 1 cup packed brown sugar
- 2 tablespoons cinnamon
- 1/2 cup heavy cream (for pouring over the risen rolls)
For the Frosting:
- 6 ounces cream cheese (softened)
- 1/3 cup butter (softened)
- 2 cups powdered sugar
- 1/2 tablespoon maple extract (or vanilla)
Instructions
- Pour the warm milk in the bowl of a stand mixer and sprinkle the yeast overtop.
- Add the eggs, butter, salt and sugar.
- Add the flour and mix using the beater blade just until the ingredients are barely combined. Allow the mixture to rest for 5 minutes so the flour has time to soak up the liquids.
- Scrape the dough off the beater blade and remove it. Attach the dough hook.
- Beat the dough on medium speed for 5-7 minutes or until the dough is elastic and smooth. **The dough will be tacky and will still be sticking to the sides of the bowl. That's ok! Don't be tempted to add more flour at this point.
- Spray a large bowl with cooking spray.
- Use a rubber spatula to remove the dough from the mixer bowl and place it in the greased large bowl.
- Cover the bowl with a towel or wax paper.
- Set the bowl in a warm place and allow the dough to rise until double. I like to turn on the oven to the lowest setting for 1-2 minutes. Then turn off the oven and place the dough to rise in there. It normally takes about 30 minutes for the dough to rise. Do not allow the dough to rise too much or your cinnamon rolls will be airy.
- While the dough is rising, prepare the cinnamon filling. In a medium bowl, combine the soft butter, brown sugar and cinnamon, mixing until well combined. Set aside.
- Sprinkle a pastry mat generously with flour. Turn out the dough onto the pastry mat and sprinkle the top of the dough with additional flour.
- Flour a rolling pin and roll the dough to about a 24x15" rectangle. (the size of the rectangle can vary...it does not have to be exact!)
- Use a rubber spatula to smooth the cinnamon filling over the whole dough rectangle.
- Starting on the long end, roll the dough up tightly jelly roll style.
- Cut into 12 slices and place in a greased 9x13 baking pan.*
- Cover the pan and allow the rolls to rise for 20 minutes or until nearly double.
- Preheat the oven to 375 degrees.
- Warm the heavy cream until the chill is off. Don't make it hot...you just don't want it cold. It should be warm to the touch.
- Once the rolls have risen, pour the heavy cream over the top of the rolls, allowing it to soak down in and around the rolls.
- Bake at 375 degrees for 17-19 minutes, until the rolls are lightly golden brown and the center rolls are cooked through. Note...the time will vary based on how big the rolls are, what type of pan, how close the rolls are packed, etc. They could take up to 25 minutes.
- While the rolls are cooling, prepare the cream cheese frosting.
- In a large bowl, combine the softened cream cheese and butter using a hand mixer. Blend well.
- Add in your favorite extract and the powdered sugar. Beat until combined.
- Spread the frosting over the cooled rolls.
- Store in an airtight container.
Notes
**Different yeast calls for slightly different proofing methods. We follow Red Star Platinum's temperature guidelines. Please check your yeast packet to see what temperature the milk should be at.
*For smaller rolls, cut the dough into 15 slices and use a 10x15" baking pan.
*Time shown does not include time for rising, so this recipe will take longer than 49 minutes. Plan about 2-2 1/2 hours with rising time and everything.
Wednesday, December 11, 2019
Roots
My mother is of Germain-Austrian-Hungarian (with a touch of Gypsy) heritage so growing up we ate things the neighborhood kids thought was weird. Things like liverwurst, landjaeger, lebekaissen, etc. Last month I was feeling a little sentimental and decided to go back to a dish my Mom used to make but hasn't made in a very long time. Hungarian Goulash. I remember eating bowl after bowl of this on camping trips to Moosehead Lake, ME when the weather got damp and chilly. Since it was cold here, I decided to make a batch for myself. I don't know if this is how my mom made hers - I will have to ask - but the results were delicious and stirred up those fond childhood memories. I did find that once everything cooked down I had a lot of sauce compared to the meat but that was ok since I used the extra sauce
to make chicken paprika later in the week. I'll post that recipe another day.
Hungarian Goulash
2 Lbs Stew Beef
2 Cups flour
2-3 Tbs vegetable oil
3 medium onions, sliced
5 cloves garlic, crushed,
1 large can diced tomato
1 small can tomato paste
1 Cup beef broth
4 Tbs Hungarian paprika (sweet)
1 tsp caraway seed
2 bay leaves
Heat oil in a stock pot
Dredge beef in flour and brown in hot oil (small batches)
When beef is browned remove it from pot and set aside.
Add onions and garlic to pot, and saute until softened
Return beef to pot and add remaining ingredients.
Lower heat and simmer for 2 hours until beef is tender
Sever over egg noodles with a dollop or sour cream
Tuesday, September 10, 2019
A Roll By Any Other Name
We are in full Fall mode here in New England. Even though the trees haven't really started turning, morning temperatures are brisk making it REALLY hard to get out of bed. While everyone else is talking about pumpkin spice lattes (gross), I am all about the comfort food that doesn't really go well with 98 degree weather with 98% humidity. You know those recipes that require long periods on the stove or in the oven and are best eaten piping hot. Soups, stews, and the subject of this post, GOLABKI!or is it Golumpki? Halupki? Sarma? No matter what you call it, it is a stuffed cabbage roll and it is delicious! To makes things even better, I recently was informed that boiling the head of cabbage and peeling off the leaves one by one is no longer required. HALLELUJAH!!! All you need to do is freeze that head of cabbage solid and then let it defrost. The leaves peel right off and you don't have to burn your fingers. SWEET! You do still need to cut out the thick veins where necessary. This is a basic and relatively small batch recipe since the hubs turns his nose up at cabbage, but it still manages to turn out a couple dozen rolls (some were small - like cabbage dumplings). Hope you like it as much as I do.
Cabbage Rolls
1 small to medium sized cabbage
Filling
1 lb ground beef
1 lb ground pork
1/2 lb ground veal
2/3 cup white rice, soaked in warm water for 30 minutes
1 medium onion chopped fine
2 tsp salt
1 tsp black pepper
2 tbs chopped fresh parsley
3 cloves garlic
2 Tbs worcestershire
1/4 C ketchup
1 carrot, grated (optional)
Sauce
1 bottle tomato juice
6 slices good quality cooked bacon
2 cups apple juice or 2 Tbs brown sugar
bay leaves (optional)
Freeze cabbage overnight and allow to thaw in a colander set in a bowl
When thawed, remove leaves cutting away and thick veins.
Dry and set aside
Mix the filling ingredients together until fully incorporated.
Place a few spoonfuls of filling mixture into the cabbage leaf and roll like a burrito (click here for a tutorial)
Once cabbage rolls are all rolled, coat the bottom of a deep roasting pan with tomato juice. Place half of the bacon on the bottom of the pan. Place cabbage rolls in the pan. Multiple layers are ok. Once all the rolls are in, add remaining bacon to the pan and pour apple juice and remaining tomato juice over the top to cover rolls. Add bay leaves if using. Cover tightly with foil or a lid and bake a 350F for 2-3 hours or until cabbage is tender. Serve with sour cream.
Sauce 2
This is an alternative to the sauce recipe above. I came up with it because they didn't have tomato juice at BJs and I didn't want to go to another store so I bought V8. The V8 was noticeably thinner. I think I like this sauce better than the original!
1 small can tomato paste
2 Tbs brown sugar
V8 juice
2 bay leaves
pour enough V8 juice to cover the bottom of the stock pot about 1/2 inch. Add brown sugar and tomato paste. Whisk together until smooth. Add cabbage rolls and then add additional V8 to cover the rolls. Cover and simmer until rolls are done (1-2 hrs)
Cabbage Rolls
1 small to medium sized cabbage
Filling
1 lb ground beef
1 lb ground pork
1/2 lb ground veal
2/3 cup white rice, soaked in warm water for 30 minutes
1 medium onion chopped fine
2 tsp salt
1 tsp black pepper
2 tbs chopped fresh parsley
3 cloves garlic
2 Tbs worcestershire
1/4 C ketchup
1 carrot, grated (optional)
Sauce
1 bottle tomato juice
6 slices good quality cooked bacon
2 cups apple juice or 2 Tbs brown sugar
bay leaves (optional)
Freeze cabbage overnight and allow to thaw in a colander set in a bowl
When thawed, remove leaves cutting away and thick veins.
Dry and set aside
Mix the filling ingredients together until fully incorporated.
Place a few spoonfuls of filling mixture into the cabbage leaf and roll like a burrito (click here for a tutorial)
Once cabbage rolls are all rolled, coat the bottom of a deep roasting pan with tomato juice. Place half of the bacon on the bottom of the pan. Place cabbage rolls in the pan. Multiple layers are ok. Once all the rolls are in, add remaining bacon to the pan and pour apple juice and remaining tomato juice over the top to cover rolls. Add bay leaves if using. Cover tightly with foil or a lid and bake a 350F for 2-3 hours or until cabbage is tender. Serve with sour cream.
Sauce 2
This is an alternative to the sauce recipe above. I came up with it because they didn't have tomato juice at BJs and I didn't want to go to another store so I bought V8. The V8 was noticeably thinner. I think I like this sauce better than the original!
1 small can tomato paste
2 Tbs brown sugar
V8 juice
2 bay leaves
pour enough V8 juice to cover the bottom of the stock pot about 1/2 inch. Add brown sugar and tomato paste. Whisk together until smooth. Add cabbage rolls and then add additional V8 to cover the rolls. Cover and simmer until rolls are done (1-2 hrs)
Subscribe to:
Posts (Atom)